- Published on
AdonisJS: ToDo App
- Authors

- Name
- Anthony Mineo
- @mineo27

About
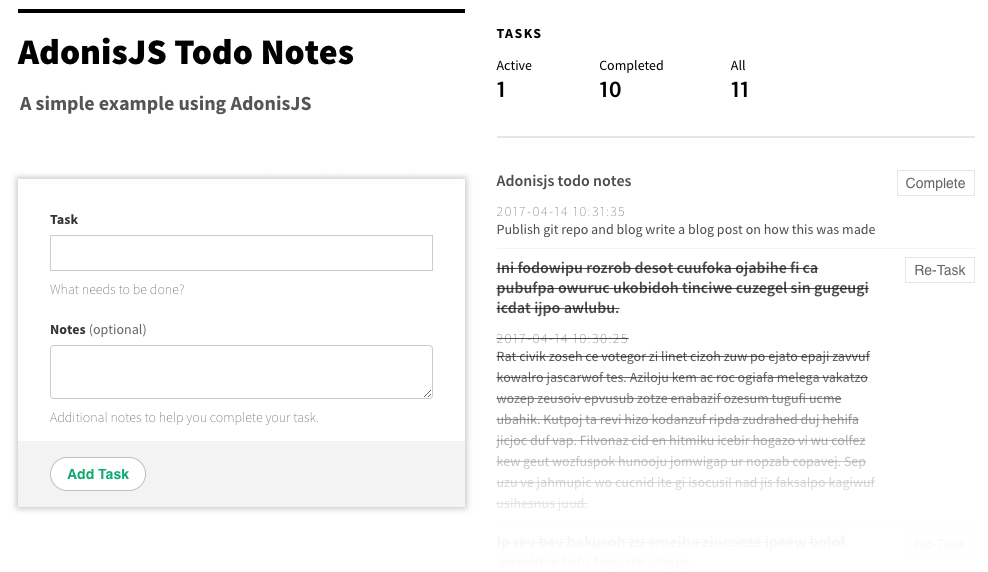
The purpose of creating this ToDo app was to get more comfortable with Node and the Adonis framework. This isn't a walk-through on how to create a ToDo App, but rather the bits-and-pieces of Adonis that makeup the app.
If you haven't heard of Adonis before, it's a very nice MVC framework for Node that's heavily inspired by some of the most battle-tested frameworks like Rails, Django and Laravel.
App Setup

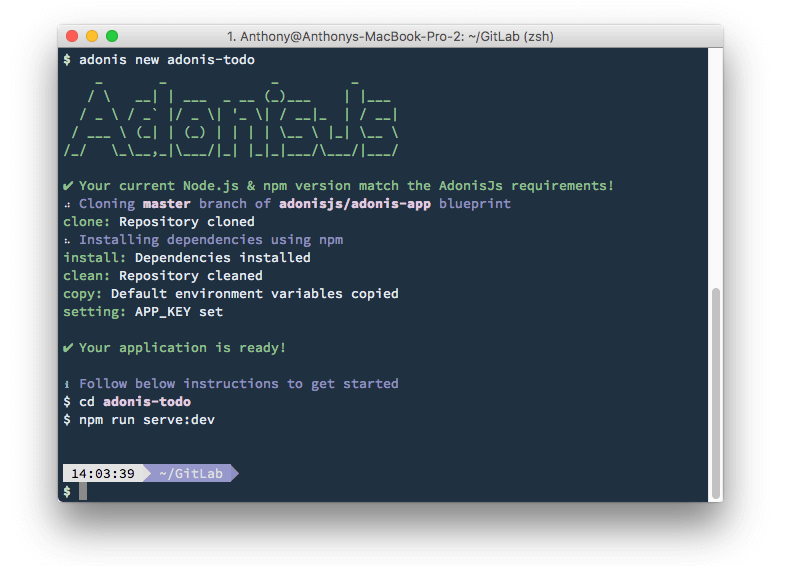
Once you have the Adonis CLI installed you can easily scaffold your app.
# Install CLI
npm i -g adonis-cli

# Scaffold the app
adonis new adonis-todo

cd adonis-todo

# Run the app
npm run serve:dev
Install SQLite
Adonis supports some big name databases (PostgreSQL, SQLite, MySQL, MariaDB, Oracle, MSSQL) with it's ORM Lucid. For my demo I chose SQLite since it's already setup to be used by default in Adonis.
npm i --save sqlite3
Install the Form Validation Provider
Adonis has a built-in solution for easily building secure and maintainable forms with Form Builder. However, the Validation provider isn't installed by default and does require a few additional simple steps to get going.
npm i --save adonis-validation-provider
/*
   location: /bootstrap/app.js
*/

// Add to the providers array
const providers = [
  // ...
  'adonis-validation-provider/providers/ValidatorProvider'
  // ...
]

// Add to the aliases array
const aliases = {
  // ...
  Validator: 'Adonis/Addons/Validator'
  // ...
}
Setting up Routes
Routes for Adonis are configured in /app/routes.js.
/*
   location: /app/routes.js
*/

const Route = use('Route')

Route.get('/', 'TasksController.index')
Route.post('/', 'TasksController.store')
Route.post('/task/update','TasksController.update')
Setup our Views
The first view that's setup by default in Adonis is master.njk. This view serves as the main view into your application. Adonis also uses Nunjucks for it's template language.
{#/resources/views/master.njk#}
<!doctype html>
<html lang="en">
<head>
  <meta charset="utf-8">
  <meta http-equiv="X-UA-Compatible" content="IE=edge">
  <meta name="viewport" content="width=device-width, initial-scale=1.0, maximum-scale=1.0, user-scalable=no">

  <title>AdonisJs - Todo Notes</title>

  <link href='http://fonts.googleapis.com/css?family=Source+Sans+Pro:400,200,300,600,700,900' rel='stylesheet' type='text/css'>
  <link rel="icon" href="/assets/favicon.png" type="image/x-icon">

  <link rel="stylesheet" href="https://unpkg.com/tachyons@4.6.1/css/tachyons.min.css"/>
  <link rel="stylesheet" type="text/css" href="style.css">
</head>
<body>
  <main>
    <section>

      <article class="cf ph3 ph5-ns pv5">
        <header class="fn fl-ns w-50-ns pr4-ns">
          <h1 class="f2 lh-title fw9 mb3 mt0 pt3 bt bw2">
            AdonisJS Todo Notes
          </h1>
          <h2 class="f4 mid-gray lh-title">
            A simple example using AdonisJS
          </h2>


            <div class="black-80 mv5 shadow-2">

            {% if old('errors') %}
              <div class="pa4 bg-washed-red">
                {% for error in old('errors') %}
                  <li class="b"> {{ error.message }} </li>
                {% endfor %}
              </div>
            {% endif %}

              {{ form.open({ action: 'TasksController.store'}) }}

                {{ csrfField }}

              <div class="measure pa4 pb2">
                <label for="task" class="f6 b db mb2">Task</label>
                <input type="text" name="name" class="input-reset ba b--black-20 pa2 mb2 db w-100">
                <small class="f6 black-60">What needs to be done?</small>
              </div>
              <div class="measure ph4 pv3">
                <label for="note" class="f6 b db mb2">Notes <span class="normal black-60">(optional)</span></label>
                <textarea name="note" class="db border-box hover-black w-100 measure ba b--black-20 pa2 br2 mb2" aria-describedby="comment-desc"></textarea>
                <small class="f6 black-60">Additional notes to help you complete your task.</small>
              </div>
              <div class="ph4 pv3 bg-near-white">
                {{ form.button('Add Task', 'submit', { class: 'f6 fw6 bg-white link dim br-pill ba ph3 pv2 dib green' }) }}
              </div>
              {{ form.close() }}
            </div>

        </header>
        <div class="fn fl-ns w-50-ns">

            {% block content %}{% endblock %}

        </div>
      </article>


    </section>
  </main>
</body>
</html>
Notice the {{ csrfField }} output inside the form. Adonis has CSRF Protection baked in to help mitigate unidentified requests.
Meet our new friend, Ace
Ace is an interactive shell that runs commands to generate controllers, models, run migrations, and more. To learn more on what Ace can do visit the official docs.
./ace make:view task
Running the command above, Ace will generate a new view file named task in /resources/views/tasks.njk.
{#/resources/views/tasks.njk#}
{% extends 'master' %}
{% block content %}
<div class="mb4 bb pb4 pt3 bw1 b--black-10">
<h3 class="f6 ttu tracked mb3">Tasks</h3>
<div class="cf">
<dl class="fl fn-l w-50 dib-l w-auto-l lh-title mr5-l">
<dd class="f6 fw4 ml0">Active</dd>
<dd class="f3 fw6 ml0">{{ stats.active }}</dd>
</dl>
<dl class="fl fn-l w-50 dib-l w-auto-l lh-title mr5-l">
<dd class="f6 fw4 ml0">Completed</dd>
<dd class="f3 fw6 ml0">{{ stats.completed }}</dd>
</dl>
<dl class="fl fn-l w-50 dib-l w-auto-l lh-title mr5-l">
<dd class="f6 fw4 ml0">All</dd>
<dd class="f3 fw6 ml0">{{ stats.allTasks }}</dd>
</dl>
</div>
</div>
<!-- output tasks -->
{% for task in tasks %}
<article class="dt w-100 bb b--black-05 pb2 mt2 black-70 {% if task.completed %}strike{% endif %}">
<div class="dtc v-top">
<h1 class="f6 f5-ns fw6 lh-title mt0">{{ task.name | capitalize }}</h1>
<time class="f6 ttu tracked gray">{{ task.updated_at }}</time>
<p class="f6 fw4 mt0 mb0 lh-copy measure">{{task.note}}</p>
</div>
<div class="dtc w-20 v-top">
{{ form.open({ action: 'TasksController.update', class: 'w-100 tr' }) }}
{{ csrfField }}
{% if task.completed %}
<button class="f6 ph2 button-reset bg-white ba b--black-10 dim pointer pv1 black-60" type="submit">Re-Task</button>
{{ form.hidden('completed', '0') }}
{% else %}
<button class="f6 ph2 button-reset bg-white ba b--black-10 dim pointer pv1 black-60" type="submit">Complete</button>
{{ form.hidden('completed', '1') }}
{% endif %}
{{ form.hidden('id', task.id) }}
{{ form.close() }}
</div>
</article>
{% else %}
<div class="flex items-center justify-center pa4 bg-washed-green dark-green">
<span class="lh-title ml3 b">✓ All Tasks Completed!</span>
</div>
{% endfor %}
{% endblock %}
Setup our Controller
./ace make:controller Tasks
Ace will create controllers in /app/Http/Controllers/.
/*
   location: /app/Http/Controllers/TasksController.js
*/
'use strict'

const Task = use('App/Model/Task')
const Validator = use('Validator')

class TasksController {

// For our tasks view
    * index (request, response){
        const tasks =  yield Task.query().orderBy('completed', false)
                                         .orderBy('updated_at', 'desc')
                                         .fetch()

        const statsActive = yield Task.query().where('completed',false).count('id')
        const statsComplete = yield Task.query().where('completed', true).count('id')


        const tasksObj = tasks.toJSON()
        const statsObj = {
                           allTasks: Object.keys(tasksObj).length,
                           active: statsActive[0]['count("id")'],
                           completed: statsComplete[0]['count("id")']
                        }

        yield response.sendView('tasks', {
                                            tasks: tasksObj,
                                            stats: statsObj
                                        })
    }


// Store the task in our database (SQLite)
    * store (request, response){
        const postedData = request.only('name', 'note')

        const rules = {
            name: 'required'
        }

        const validation = yield Validator.validate(postedData, rules);

        if (validation.fails()) {
            yield request
                  .withOnly('name')
                  .andWith({ errors: validation.messages()})
                  .flash()

            response.redirect('back')
            return
        }

        yield Task.create(postedData)
        response.redirect('/')
    }


// Update the tasks
    * update (request, response){
        const postedData = request.only('id','completed')

        const rules = {
            id: 'required',
            completed: 'required'
        }
        const validation = yield Validator.validate(postedData, rules);

        if (validation.fails()){
            response.redirect('back')
            return
        }

        yield Task.query().where('id', postedData.id)
                          .update({completed: postedData.completed})
        response.redirect('/')
    }


};
module.exports = TasksController
Setup the Task Model
./ace make:model Task
Ace will create Models in /app/Model/.
In most cases, you probably won't have a need to modify your model files. In Adonis, each model is it's own Class that extends Lucid (ORM).
Create a Migration
./ace make:migration tasks --create=tasks
Running the command above, Ace will create an empty tasks migration file in /database/migrations/.
In my case, Ace created the file: 1490468910171_tasks.js. Notice the timestamp prefix. This is used so you can safely migrate your table forward or backwards. More on this in a bit. Below are the modifications I've made to it.
/*
   location: /database/migrations/1490468910171_tasks.js
*/

'use strict'

const Schema = use('Schema')

class TasksTableSchema extends Schema {

  up () {
    this.create('tasks', (table) => {
      table.increments()

      table.string('name')
      table.text('note')
      table.boolean('completed').defaultTo(false)

      table.timestamps()
    })
  }

  down () {
    this.drop('tasks')
  }

}

module.exports = TasksTableSchema
Running the Migration
./ace migration:run
After you create a migration schema, you can run/apply all pending migrations with the command above. Migrations are executed in a batch and give you the flexibility to rollback to any given batch. And for that reason, if you need to modify a schema It's recommended that you create a new migration instead of modifying the same migration file. Almost like a version control for your database. :)
After running an initial migration, a new development.sqlite file will be created in /database/. Any future migrations will modify that database.
Using Seeds & Factories for Dummy Data
Seeding your database with dummy data can be useful for stubbing out the initial state of your app or for running tests. In Adonis, each factory blueprint callback receives an instance of chancejs to generate fake data. Factories can be found in /database/ and Seeds in /database/seeds/.
/*
   location: /database/factory.js
*/

const Factory = use('Factory')

Factory.blueprint('App/Model/Task', (fake) => {
  return {
    name: fake.sentence(),
    note: fake.paragraph(),
    completed: fake.bool()
  }
})
/*
   location: /database/seeds/Database.js
*/

const Factory = use('Factory')

class DatabaseSeeder {
  * run () {
    yield Factory.model('App/Model/Task').create(5)
  }
}
module.exports = DatabaseSeeder
In our Database.js (seed file), we tell DatabaseSeeder that we want to run our factory blueprint (5) times on our Task model.
And finally, running db:seed with ace will seed our database.
./ace db:seed
Download
If you have any questions, hit me up on Twitter.