- Published on
Easily Log Your Web Traffic to DataDog using CloudFlare Workers
- Authors

- Name
- Anthony Mineo
- @mineo27
I love DataDog, and I love CloudFlare, and If you're aggressively caching as we do, a good portion of requests won't ever make it to the origin, which is a good thing. However, a downside is that you'll likely miss out on having complete traffic logs. Fortunately, using CloudFlare Workers can help us solve this issue.
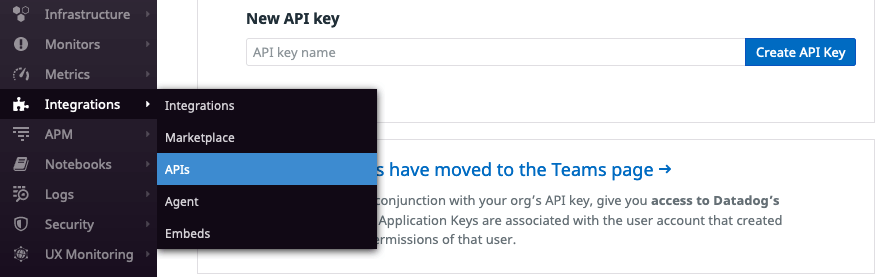
Generate an API Key in DataDog
First, we need to create a new API key for CloudFlare Workers to use. Please don't use an already existing one! ;)
Setup a KV Store in CloudFlare
Now, in CloudFlare, go ahead and create a new KV Namespace for datadog. Then, we need to create a key-value pair for our API Key.
In our example, let's use apikey for the key name and your DataDog API key for the value.
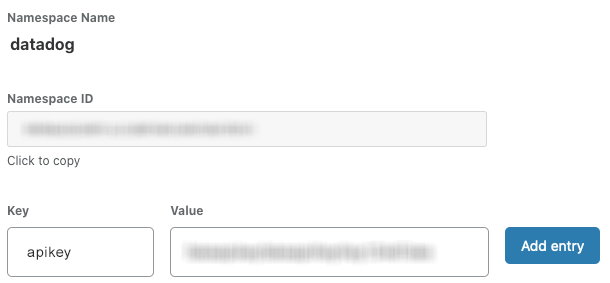
In our code, we can call datadog.get("apikey") and get back our key's value. How convenient!
Let's get coding!
So, the whole idea here is to take the browsers request and response for a resource and then forward it out to DataDog for logging via a CloudFlare worker.
Since we have complete control over what's being sent to DataDog in the data object, you can sanitize or enhance whatever you like before it gets sent off.
CloudFlare Worker
addEventListener('fetch', (event) => {
  // Prevent errors on the frontend if DataDog's API acts up
  event.passThroughOnException()
  event.respondWith(handleRequest(event))
})

async function handleRequest(event) {
  const response = await fetch(event.request)

  event.waitUntil(logToDataDog(event.request, response))
  return response
}

async function logToDataDog(request, response) {
  // Get our key from CloudFlare KV store
  const dd_apikey = await datadog.get('apikey')
  let dd_logsEndpoint = 'https://http-intake.logs.datadoghq.com/v1/input/' + dd_apikey

  let hostname = request.headers.get('host') || ''

  // data to log
  let data = {
    ddsource: 'cloudflare',
    ddtags: 'service:cloudflare,source:cloudflare,site:' + hostname,
    hostname: hostname,
    message: {
      date_access: Date.now(),
      http: {
        protocol: request.headers.get('X-Forwarded-Proto') || '',
        host: request.headers.get('host') || '',
        status_code: response.status,
        method: request.method,
        url_details: request.url,
        referer: request.headers.get('referer') || '',
      },
      useragent_details: {
        ua: request.headers.get('user-agent') || '',
      },
      network: {
        cc: request.headers.get('Cf-Ipcountry') || '',
      },
      cloudflare: {
        ray: request.headers.get('cf-ray') || '',
        visitor: request.headers.get('cf-visitor') || '',
      },
    },
  }

  await fetch(dd_logsEndpoint, {
    method: 'POST',
    body: JSON.stringify(data),
    headers: new Headers({
      'Content-Type': 'application/json',
    }),
  })
}
How it all looks in DataDog
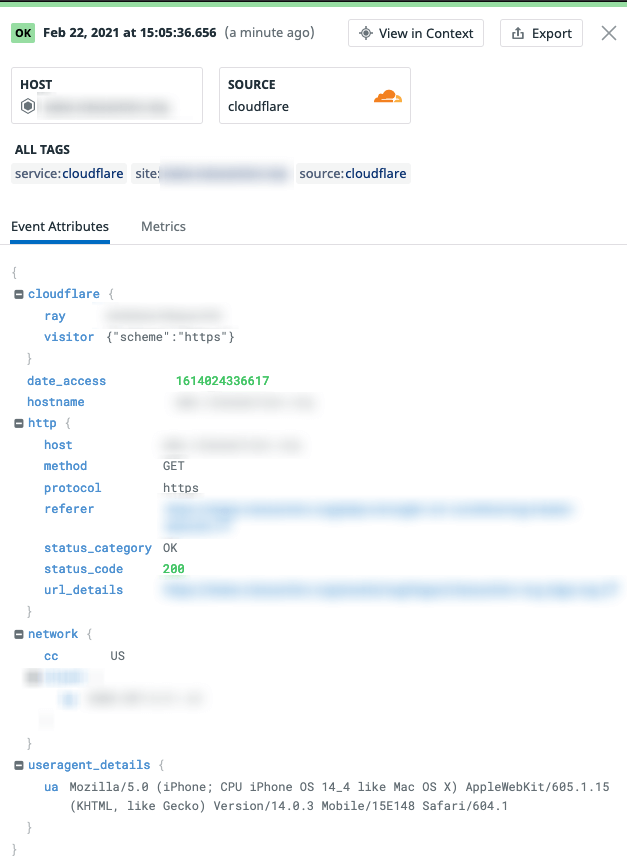
And there we have it! CloudFlare logs in DataDog. :)
Hope this helps! Hit me up on Twitter: @Mineo27 if you have any issues/questions.